
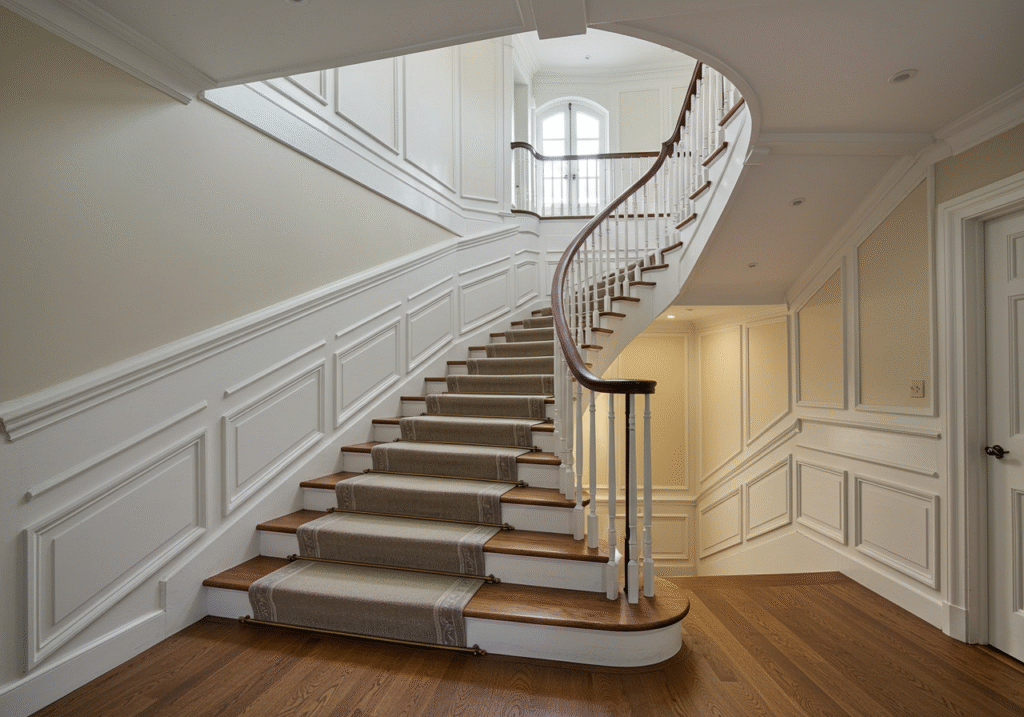
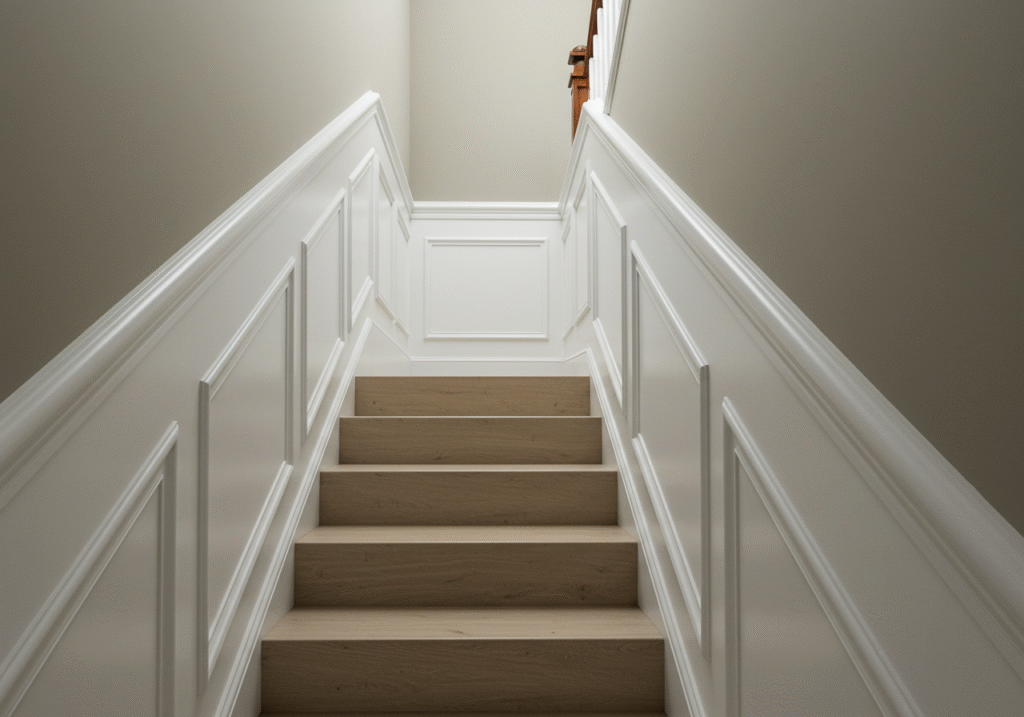
Transform your staircase into a stunning focal point with wainscoting! This timeless design technique adds elegance, durability, and character to stairways, making it a popular choice for homeowners seeking to elevate their interiors. Whether you’re renovating an old staircase or upgrading a modern space, this guide covers everything from staircase wainscoting styles and DIY installation tips to 2025 design trends.
Why Choose Wainscoting for Stairs?
Contents
- 1 Why Choose Wainscoting for Stairs?
- 2 How to Install Wainscoting on Stairs: A Step-by-Step Guide
- 3 Choosing the Right Wainscoting Height for Your Staircase
- 4 Cost of Wainscoting Stairs
- 5 Wainscoting Stairs vs. Wallpaper”
- 6 DIY vs. Professional Installation: What to Expect
- 7 2025 Trends in Staircase Wainscoting (UPDATE – remove year-specific framing)
- 8 Wainscoting for Small Stair Spaces
- 9 FAQs:
Wainscoting isn’t just decorative, it’s functional. Here’s why it’s a smart choice:
- Protection: Staircase walls take more abuse than almost any other wall in the house — shoulders, bags, furniture being carried up and down, and kids’ hands on the way up all leave marks over time. Wainscoting adds a durable physical buffer along the lower portion of the wall specifically where that contact happens, meaning scuffs and dings hit the panel rather than bare drywall or paint that shows every mark.
- Aesthetic Appeal: Beyond protection, wainscoting adds genuine architectural depth — the shadow lines created by molding and paneling catch light differently throughout the day, giving a staircase wall texture and dimension that flat paint alone can’t achieve. This is especially noticeable on a staircase specifically, since the angled wall and multiple sightlines (from below, above, and mid-stair) all show off the paneling’s depth from different angles.
- Versatility: Wainscoting isn’t tied to one aesthetic — beadboard leans cottage and farmhouse, raised panel leans traditional and formal, flat panel leans modern and minimal. This means it’s one of the few staircase upgrades that genuinely fits almost any home style, rather than being a niche choice that only works in specific interiors.
- Value Boost: A well-executed wainscoting installation reads as a custom, higher-end architectural detail to potential buyers or appraisers, which is part of why it’s a commonly cited feature in real estate listings for homes with a “finished,” considered feel. It’s a relatively contained project (compared to a full staircase remodel) that punches above its cost in terms of perceived value.
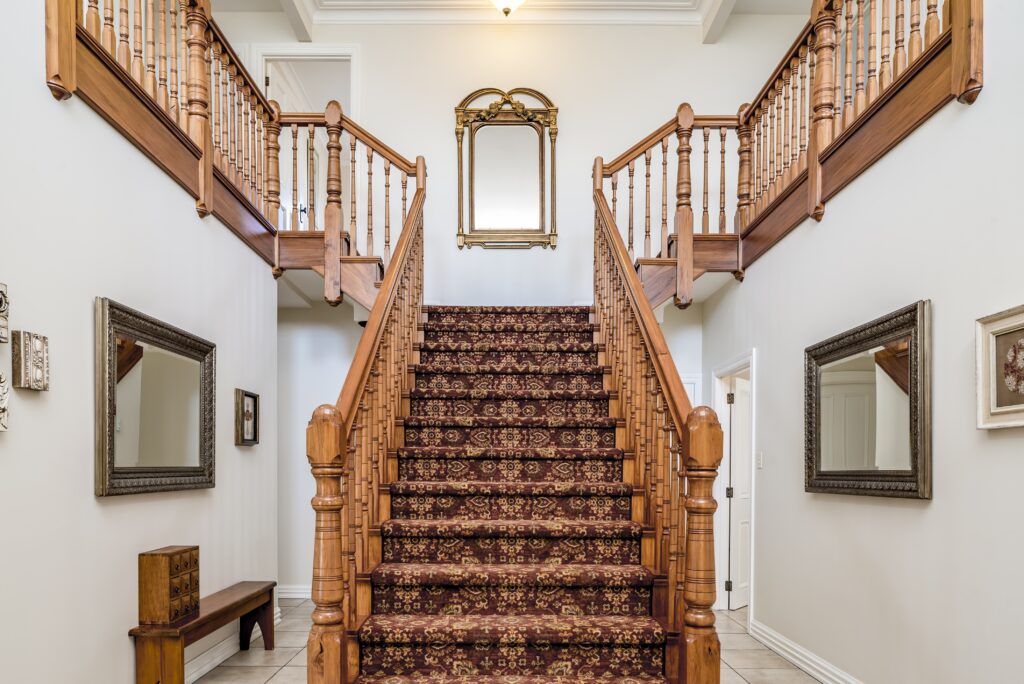
Popular Wainscoting Styles for Staircases
From classic to contemporary, these stairway wainscoting styles cater to diverse tastes:
- Beadboard Paneling: Characterized by narrow, evenly spaced vertical grooves, beadboard brings a casual, cottage or farmhouse warmth that works especially well on staircases in older homes or anywhere you want the wall treatment to feel approachable rather than formal. It’s also one of the more affordable styles to source, since beadboard panels are widely available pre-primed and ready to paint.
- Raised Panel Wainscoting: This style uses panels with a beveled or “raised” center section framed by molding, creating a more formal, dimensional look than flat styles. It suits traditional and colonial-style homes particularly well, and because the panels genuinely project outward from the wall, it creates the most pronounced shadow-line effect of any style on this list.
- Flat Panel Design: A simplified, minimalist take on wainscoting, flat panel uses smooth, unadorned panel sections separated by thin trim rather than raised detailing. This restraint makes it the best fit for modern and contemporary staircases, and its cleaner lines also make it a practical choice for narrower stairways where heavier molding can feel visually crowded.
- Board-and-Batten: This style uses vertical boards (battens) spaced evenly over a flat backing, creating strong vertical lines that visually elongate a stairway — a particularly useful trick in homes with lower ceiling heights, since the vertical emphasis draws the eye upward.
- Stair Riser Wainscoting: Rather than covering the wall, this variation applies paneling or decorative trim directly to the risers (the vertical part of each step) for a cohesive, fully custom look that ties the staircase itself into the surrounding wall treatment. It’s a more involved install than wall-only wainscoting, since it involves working directly on the walking surface, but it creates one of the most distinctive, high-end results on this list..
Materials for Wainscoting Stairs
Choosing the right wainscoting materials for stairs ensures durability and style:
- Wood: Solid wood (oak, pine, poplar) offers the most authentic look and the option to stain rather than paint, showing off natural grain. It’s more expensive than engineered alternatives and requires more careful installation to account for natural wood movement with humidity changes, but it’s the most durable option long-term if properly finished and maintained.
- MDF: MDF has become the most popular choice for painted wainscoting because it’s dimensionally stable (it won’t warp or expand the way solid wood can), machines cleanly for crisp panel edges, and costs significantly less than solid wood. The tradeoff is that it’s not suitable for staining (since it has no real wood grain) and can be damaged by prolonged moisture exposure, so it’s best reserved for painted finishes in dry areas.
- PVC: For staircases in humid climates or homes with basement stairs prone to moisture, PVC wainscoting offers genuine waterproofing that wood and MDF can’t match. It’s typically molded to mimic traditional panel profiles, so it can achieve a similar look to wood-based wainscoting while requiring essentially no maintenance beyond occasional cleaning.
- Plywood: As a budget-friendly DIY material, plywood works well for simpler flat-panel or board-and-batten styles where you’re cutting your own panels rather than buying pre-molded pieces. It’s more affordable than solid wood while still being genuinely wood-based (unlike MDF), making it a reasonable middle ground for DIYers who want real wood texture without solid lumber pricing.
How to Install Wainscoting on Stairs: A Step-by-Step Guide
For DIY stair wainscoting, follow these steps:
- Measure and Plan: Staircases present a unique measuring challenge compared to a flat wall, since the wainscoting height needs to follow the angle of the stair stringer (the diagonal line of the stairs) rather than sitting at one consistent height like it would on a level wall. Map out your total wall length, the stair angle, and where the paneling will terminate at the top and bottom of the run before ordering materials — see the height guide below for how to determine the right proportion.
- Prepare Walls: Clean the wall surface thoroughly and repair any holes, cracks, or uneven sections with spackle or joint compound, sanding smooth once dry. Staircase walls in older homes especially often have settling-related imperfections that are easy to miss until panels are installed over them and highlight every irregularity.
- Install Backing Boards: Secure a base layer of plywood or MDF to the wall studs first, giving the decorative panels and molding a stable, even surface to attach to rather than mounting directly onto potentially uneven drywall. This step also makes future panel replacement easier, since you can remove individual panels without disturbing the backing layer.
- Attach Panels and Molding: Working from the bottom up, attach panels using construction adhesive combined with finish nails for extra hold, then add the decorative cap rail, base molding, and any vertical trim pieces. On the angled stair section specifically, each panel or batten typically needs a slightly different cut angle to follow the stringer line — this is the most technically demanding part of the whole project.
- Fill Gaps and Paint: Fill Gaps and Paint. Caulk all seams between panels, trim, and the wall to create a seamless, factory-finished look, then apply primer followed by your chosen paint or stain. Two coats of paint typically gives more even, durable coverage than one, especially on MDF, which can absorb the first coat unevenly.
Note: Angled stair walls require precise cuts — using a laser level or a physical template traced from the actual stair angle will save significant time and material waste compared to measuring and cutting by eye.
Choosing the Right Wainscoting Height for Your Staircase
Getting the height proportion right is one of the most common places a stair wainscoting project goes wrong, since the same rules that work on a flat wall don’t directly translate to an angled stairway.
Standard flat-wall guideline: On a normal wall, wainscoting traditionally covers roughly one-third of the total wall height, typically landing around 32–36 inches from the floor.
Why stairs are different: Because a staircase wall’s effective height changes continuously as you move up the stairs, wainscoting on a stair run generally follows one of two approaches:
- Parallel to the stair angle (raked wainscoting): The top of the panel line follows the same angle as the stair stringer, maintaining a consistent height relative to each step — visually, this reads as the wainscoting “climbing” the stairs alongside you. This is the more common and generally more visually cohesive approach for a full staircase run.
- Stepped wainscoting: The panel height adjusts in small, level increments rather than following a continuous diagonal line, creating a subtle stair-step effect in the trim itself. This can look intentional and architectural in the right home, but requires more precise measuring and is a less forgiving install for a first-time DIYer.
A practical rule of thumb: Measure the wainscoting height at the bottom of the stairs first (using the standard 32-36 inch flat-wall guideline as your starting point), then maintain that same height relative to each stair tread as the panel line travels up the angle. At the top landing, where the wall returns to a flat, level surface, the wainscoting should return to a standard, consistent height to bookend the design cleanly.
Cost of Wainscoting Stairs
Add this table after the existing bullet points:
| Approach | Typical Cost Range | Notes |
|---|---|---|
| DIY with plywood/MDF | $200–$800 | Materials only; lowest cost, most labor |
| DIY with solid wood | $500–$1,500 | Materials only; higher material cost |
| Professional install (MDF/paint-grade) | $1,500–$3,000 | Includes labor, standard materials |
| Professional install (solid wood/high-end) | $3,000–$5,000+ | Includes labor, premium materials and finish |
| Stair riser wainscoting (add-on) | $500–$1,500 | Additional cost if adding to risers, not just walls |
Cost of Wainscoting Stairs
The cost of wainscoting stairs varies based on materials and labor:
- DIY: 200–800 (materials only).
- Professional Installation: 1,500–4,000+ (includes labor and high-end materials).
- Budget Hack: Use plywood and paint for a high-impact, low-cost staircase upgrade idea.
Wainscoting Stairs vs. Wallpaper”
DIY vs. Professional Installation: What to Expect
Whether this is a realistic DIY project depends heavily on your staircase’s complexity and your comfort level with precise angled cuts.
Good DIY candidates:
- A straight staircase run without landings or turns
- Flat panel or board-and-batten styles, which forgive minor measurement imperfections better than raised panel styles
- Homeowners comfortable using a laser level, miter saw, and basic finish carpentry tools
Better left to a professional:
- Staircases with landings, turns, or curves, where panel angles change multiple times along the run
- Raised panel or stair riser wainscoting, where visible seams or slightly inconsistent angles are much more noticeable
- Any staircase where the wall itself is significantly out of level or plumb, since this compounds the difficulty of getting angled cuts to look clean
A realistic timeline: A straightforward DIY flat-panel installation on a single staircase run typically takes a dedicated weekend for someone with basic carpentry experience, plus additional time for paint to fully cure. Professional installation of the same project usually takes 2-4 days including prep, installation, and finishing, though more complex layouts with landings or turns can extend this significantly.
2025 Trends in Staircase Wainscoting (UPDATE – remove year-specific framing)
Replace the heading “2025 Trends in Staircase Wainscoting” with “Current Trends in Staircase Wainscoting” (or update to the current year at time of publishing, and plan to update it again each year rather than leaving a fixed year in the heading – this avoids the page reading as dated once the year has passed).
Replace the intro line “Stay ahead with these staircase wainscoting trends 2025:” with:
A few directions are shaping how homeowners are approaching staircase wainscoting right now:
Keep the four existing bullets (Mixed Materials, Eco-Friendly Options, Bold Colors, Floating Wainscoting) as-is – they’re well-written and don’t need expansion, just the surrounding year references removed.
Wainscoting for Small Stair Spaces
Replace the three bullets with:
Thin Molding. Chunky, deep-profile molding can visually shrink an already tight stairwell by adding bulk to walls that don’t have space to spare. A slimmer trim profile keeps the architectural detail without eating into the narrow width, which matters more on stairs than almost any other application of wainscoting.
Vertical Paneling. Board-and-batten or any wainscoting style with a strong vertical line tricks the eye into perceiving more height than the space actually has, which matters most in narrow stairwells where the walls feel close on both sides. This effect is strongest when the vertical lines run uninterrupted from floor to cap rail, rather than being broken up by horizontal trim details.
Light Colors. Soft gray, cream, or off-white finishes reflect more available light than darker tones, which is especially valuable in stairwells that often get less natural light than the rooms they connect. A glossier paint sheen adds further light reflection, though it will also show more surface imperfections, so wall prep matters more with a higher sheen finish.
Wainscoting Stairs vs. Wallpaper: Which Is Better?
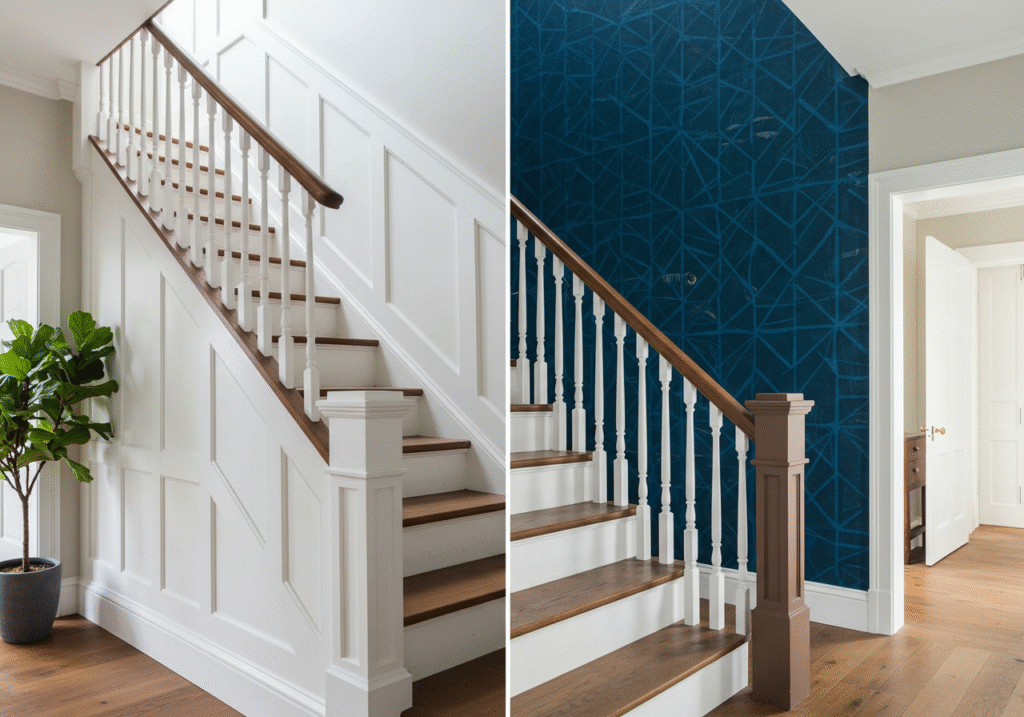
- Wainscoting: Durable, tactile, and ideal for high-traffic areas.
- Wallpaper: Quick to install and budget-friendly, but less protective.
- Design Win: Combine both! Use wainscoting on the lower half and wallpaper above for contrast.
2025 Trends in Staircase Wainscoting
Stay ahead with these staircase wainscoting trends 2025:
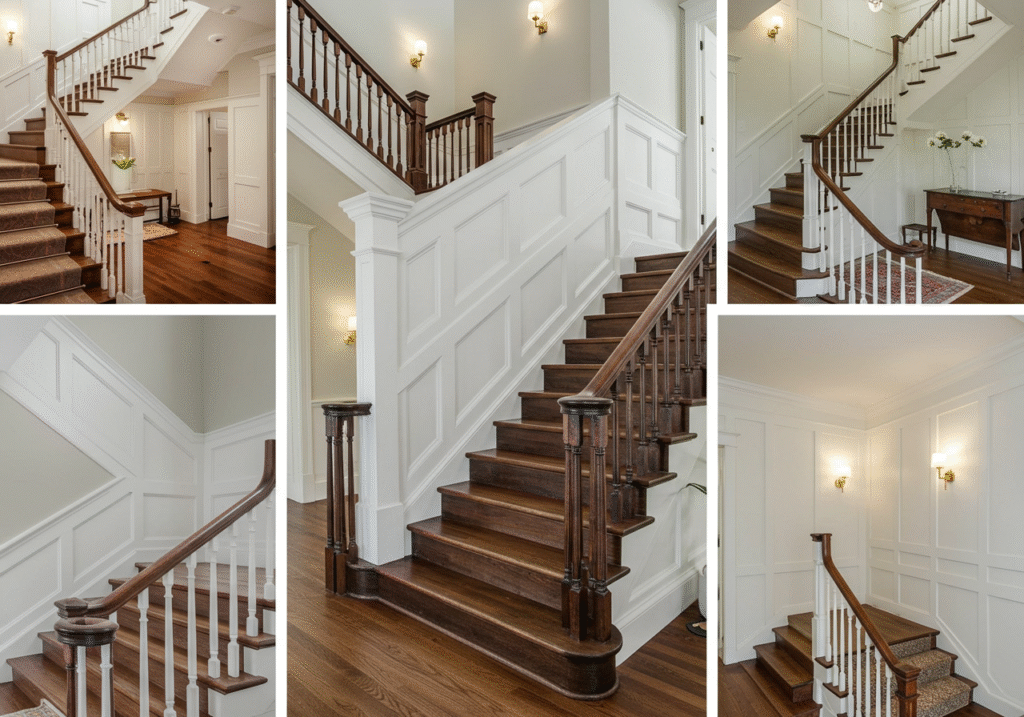
- Mixed Materials: Wood panels paired with metal accents or textured tiles.
- Eco-Friendly Options: Reclaimed wood or sustainable composites.
- Bold Colors: Deep greens, navy blues, or matte black for drama.
- Floating Wainscoting: Panels installed without baseboards for a streamlined look.
Wainscoting for Small Stair Spaces
Maximize tight areas with:
- Vertical Paneling to create height illusions.
- Light Colors like soft gray or cream, to brighten the space.
- Thin Molding to keep the design subtle yet stylish.
Maintenance Tips
- Dust regularly and clean with a damp cloth.
- Touch up paint chips promptly to prevent moisture damage.
- Avoid harsh chemicals on wood or MDF surfaces.
Conclusion:
Wainscoting stairs is a transformative staircase renovation idea that blends practicality with artistry, perfect for elevating banister basement stairs from purely functional to stylishly cohesive. Whether you opt for a DIY stair wainscoting project to refresh your basement stairs or collaborate with a pro, the result will be a stairway or banister that feels luxurious and intentional. Ready to explore wainscoting stairs before and after inspirations, including dramatic basement transformations?
FAQs:
What is the purpose of wainscoting?
Wainscoting serves both aesthetic and practical purposes. Aesthetically, it adds a touch of elegance to interior spaces, enhancing the visual appeal of walls and creating a sense of refinement. It acts as a protective layer, preventing walls from wear and tear, especially in high-traffic areas like staircases.
What is the wainscoting technique?
The wainscoting technique involves installing decorative panels on the lower part of interior walls. These panels, known as wainscoting, can come in various materials, styles, and designs. Standard techniques include applying bead board, raised paneling, or board-and-batten to create visually appealing, textured surfaces.
What style is wainscoting?
Wainscoting is a versatile design element that can adapt to various styles. It can be traditional, with classic wood paneling, or modern, incorporating sleek lines and minimalist designs. Wainscoting style depends on the chosen materials, panel patterns, and overall design preferences.
Where is wainscoting used?
Wainscoting is used in various interior spaces, including but not limited to living rooms, dining areas, hallways, and staircases. It is often employed in areas prone to impact or wear, providing aesthetic enhancement and practical wall protection.
How to install wainscoting on stairs?
Measure and mark the desired height for the wainscoting. Next, prepare the panels by cutting them to size and ensuring a proper fit. Attach the panels to the staircase walls using construction adhesive and nails. Finish by caulking gaps and painting or staining the wainscoting for a polished look.
How do you fit wall paneling on stairs?
Fitting wall paneling on stairs follows a similar process to wainscoting installation. Measure and cut the panels to the desired dimensions, ensuring a snug fit. Attach the panels using suitable adhesive or nails, starting from the bottom and working upwards.