
Introduction
Contents
- 1 Introduction
- 1.1 1. Turn Off the Power Completely
- 1.2 2. Remove the Old Fixture
- 1.3 3. Check the Electrical Box
- 1.4 4. Assemble the Fan Components
- 1.5 5. Attach the Mounting Bracket
- 1.6 6. Connect the Wires
- 1.7 7. Secure the Fan Motor
- 1.8 8. Install the Fan Blades
- 1.9 9. Add the Light Kit (If Included)
- 1.10 10. Attach the Fan Canopy
- 1.11 11. Turn the Power Back On
- 1.12 12. Check for Wobbling
- 1.13 13. Clean Up the Workspace
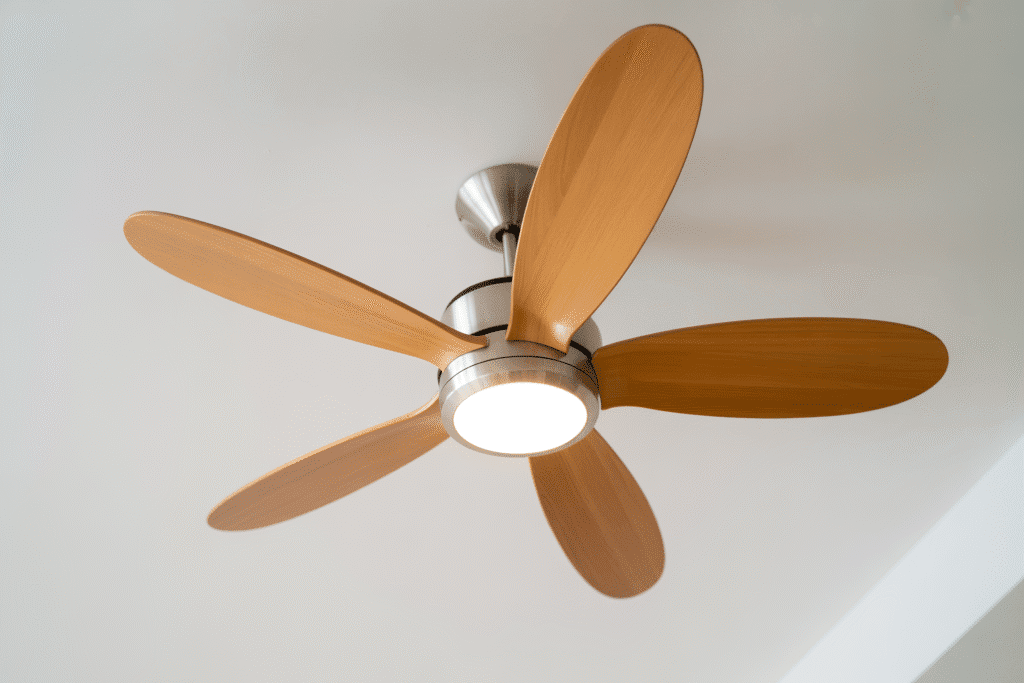
- 1.14 14. Enjoy the Final Result
- 2 Final Thoughts
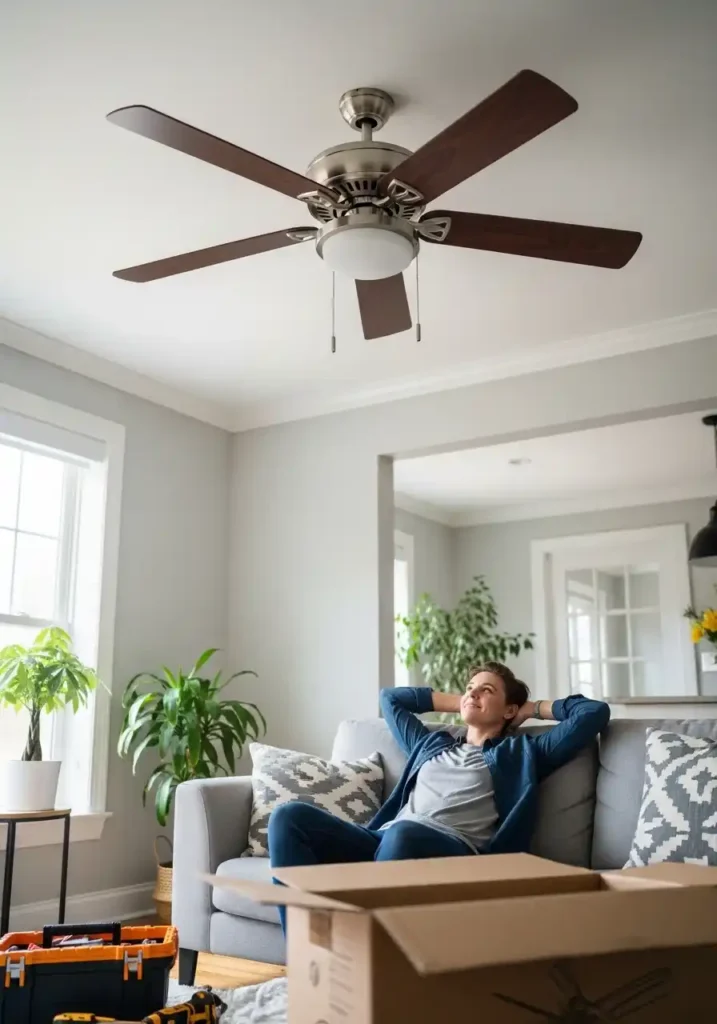
Installing a ceiling fan might seem intimidating at first, especially if you’ve never handled electrical work before. The good news is that with the right tools, clear instructions, and a bit of patience, it’s a project most beginners can successfully complete. A ceiling fan not only improves air circulation but also adds style and comfort to any room. Follow these simple step-by-step ideas to install your ceiling fan with confidence.
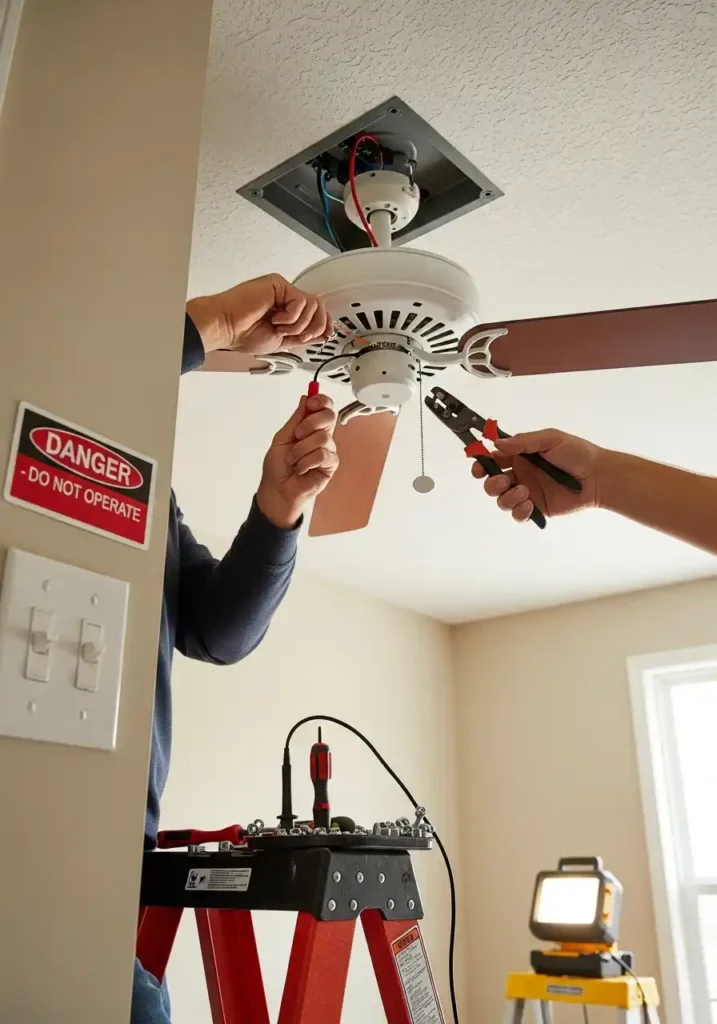
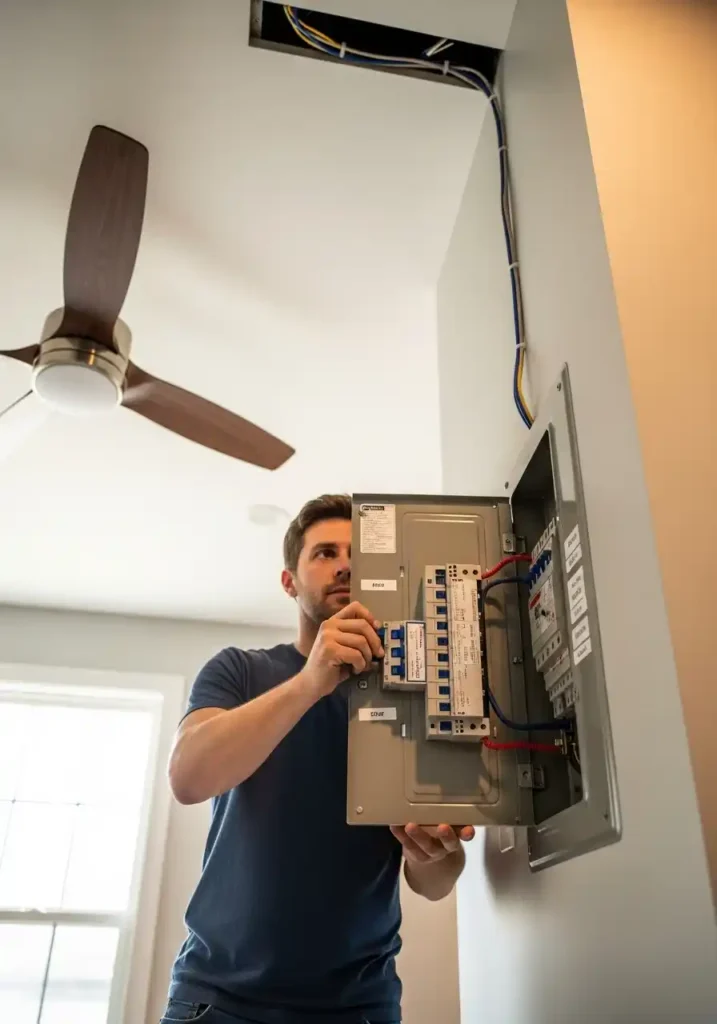
1. Turn Off the Power Completely
Before doing anything, switch off the power at the breaker box, not just the wall switch. This ensures your safety while working with electrical wires. Use a voltage tester to double-check that no electricity is flowing. Safety should always be your top priority.
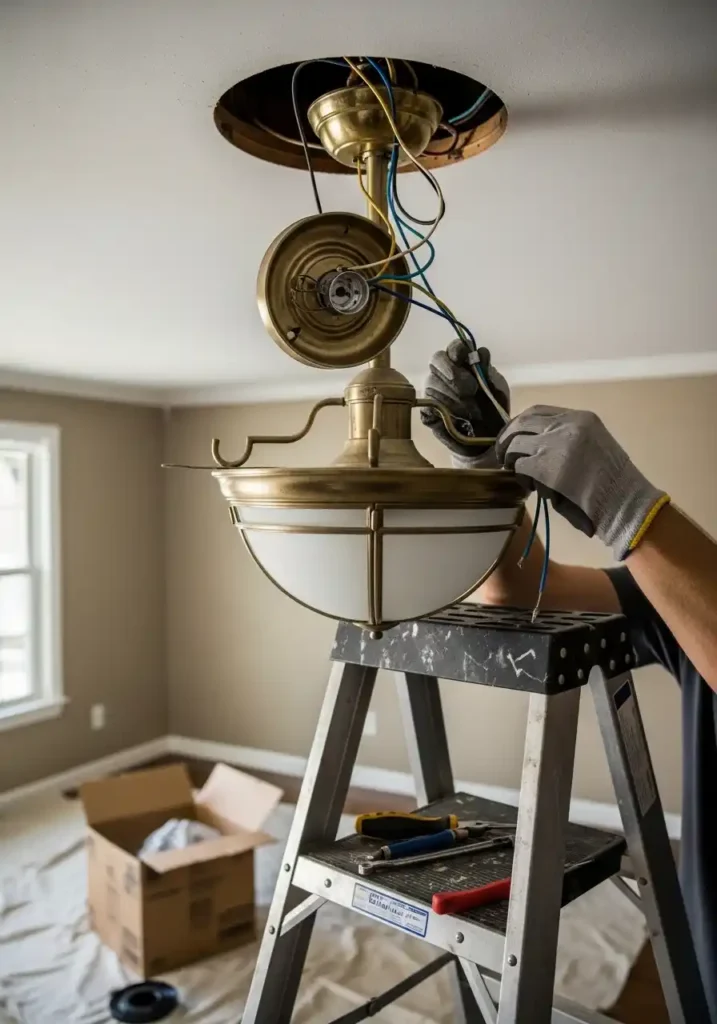
2. Remove the Old Fixture
Carefully unscrew and remove the existing light fixture from the ceiling. Disconnect the wires slowly and keep track of which wires were connected. If needed, take a quick photo for reference. This will help you connect the new fan correctly.
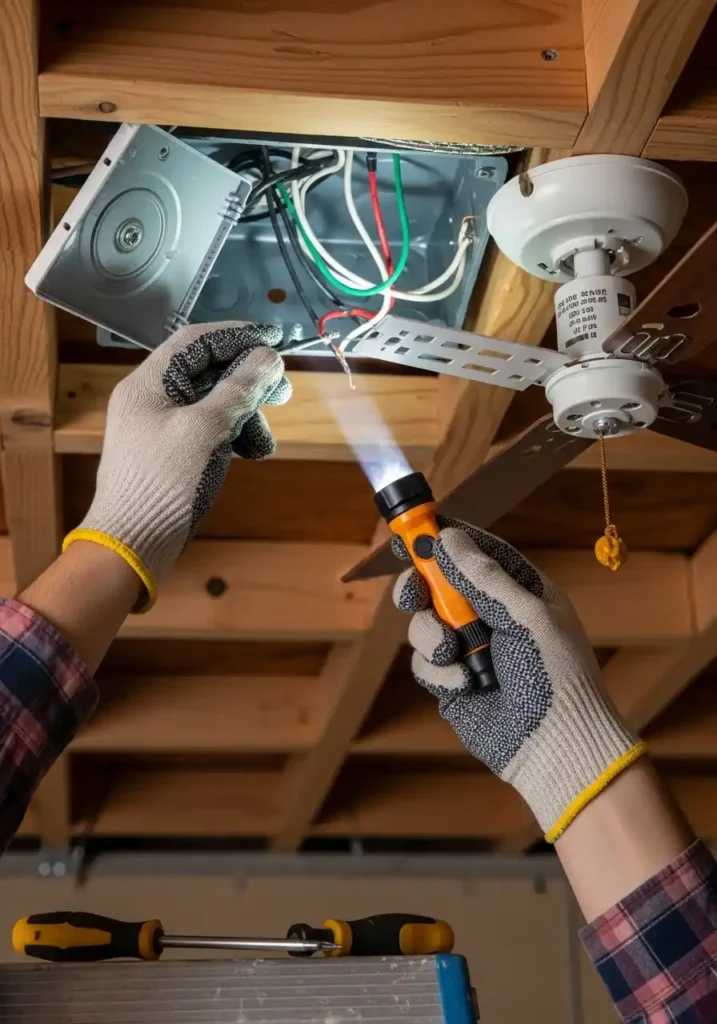
3. Check the Electrical Box
Make sure the ceiling electrical box is rated for a ceiling fan. Standard light boxes are not strong enough to support the weight and movement of a fan. If necessary, replace it with a fan-rated box. A secure foundation prevents wobbling and future issues.
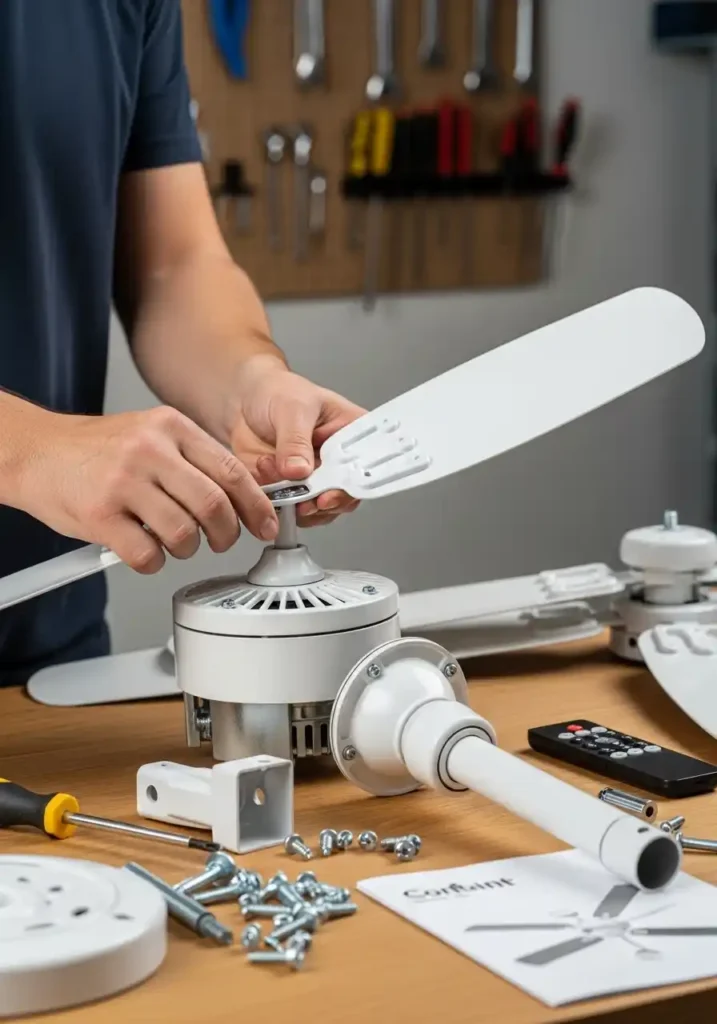
4. Assemble the Fan Components
Before climbing the ladder, assemble the fan blades, motor housing, and downrod according to the manufacturer’s instructions. Organizing parts ahead of time makes installation smoother. Keep screws and small parts in a tray so nothing gets lost. Preparation saves time and frustration.
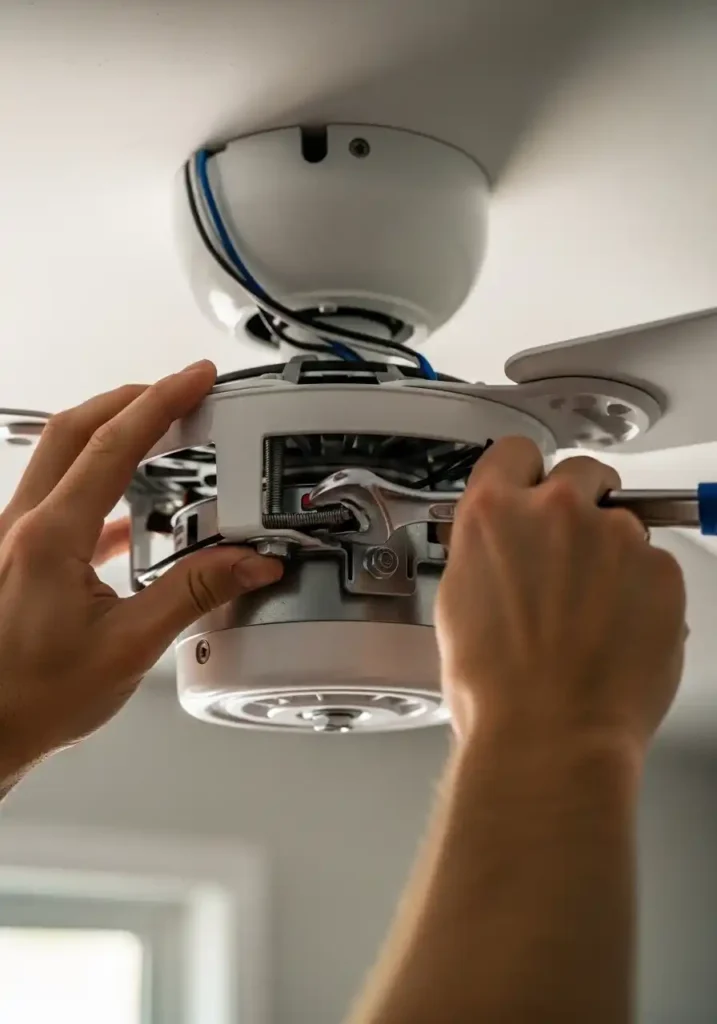
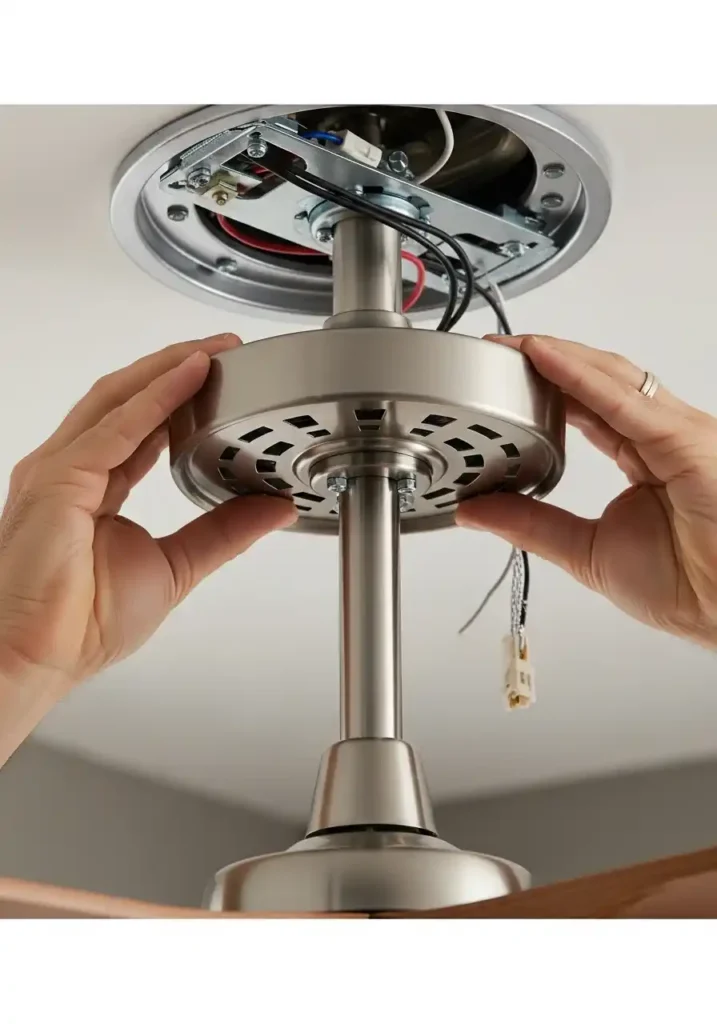
5. Attach the Mounting Bracket
Secure the mounting bracket to the ceiling box using the provided screws. Tighten it firmly so it can support the fan’s weight. This bracket will hold the motor in place. A properly installed bracket ensures stability.

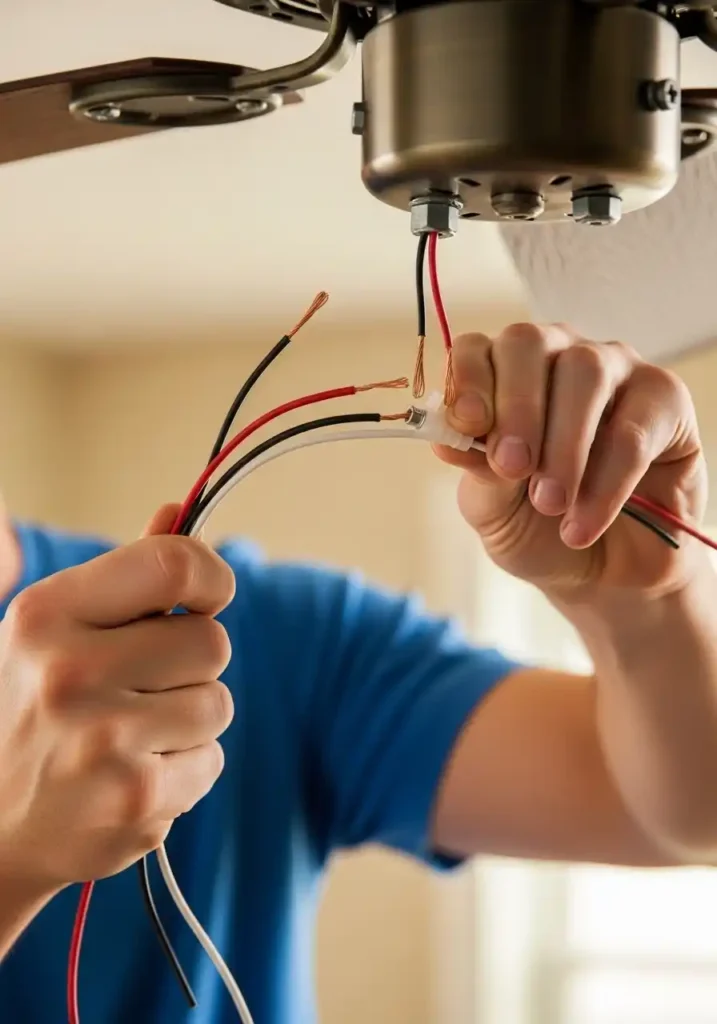
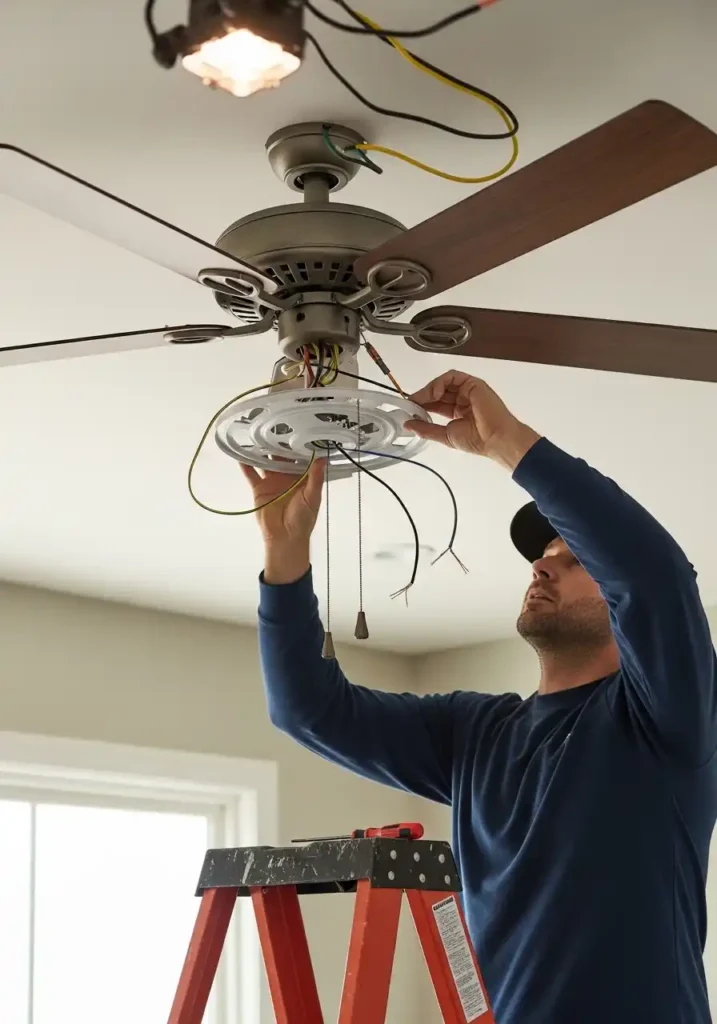
6. Connect the Wires
Match the wires from the ceiling to the fan wires—typically black to black (hot), white to white (neutral), and green or bare copper to ground. Twist them together and secure with wire nuts. Gently tuck the wires back into the box. Correct wiring ensures safe operation.
7. Secure the Fan Motor
Lift the fan motor and attach it to the mounting bracket. This step may require an extra pair of hands for support. Make sure it locks securely into place. A firm attachment prevents movement and noise.
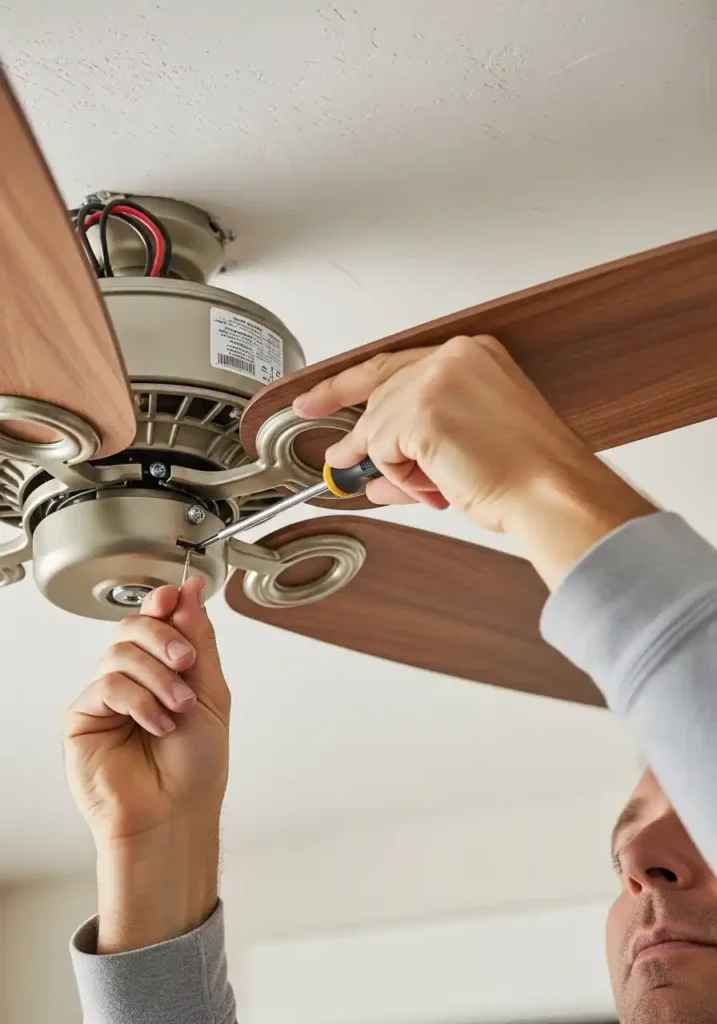
8. Install the Fan Blades
Attach each blade to the blade brackets and then to the motor. Tighten screws evenly to avoid wobbling. Double-check that all blades are aligned properly. Balanced blades help the fan run smoothly.
9. Add the Light Kit (If Included)
If your ceiling fan includes a light kit, connect the wiring following the instructions. Secure the light fixture and install the bulbs. Ensure everything is tightened properly. This adds both function and style to your fan.
10. Attach the Fan Canopy
Carefully slide the canopy up to cover the wiring and mounting bracket. Secure it with screws. This gives your installation a clean, finished look. It also protects the wiring connections.
11. Turn the Power Back On
Return to the breaker panel and switch the power back on. Test the fan and light using the wall switch or remote control. Make sure all functions operate correctly. If something doesn’t work, turn the power off before rechecking connections.
12. Check for Wobbling
Turn the fan on at different speeds to check for wobbling. If you notice movement, adjust the blade screws or use a balancing kit. Small adjustments can make a big difference. A balanced fan runs quietly and efficiently.

13. Clean Up the Workspace
Remove tools, packaging, and any debris from the area. Wipe down the fan blades to remove fingerprints or dust. A tidy space makes your project feel complete. Enjoy the improved look of your room.
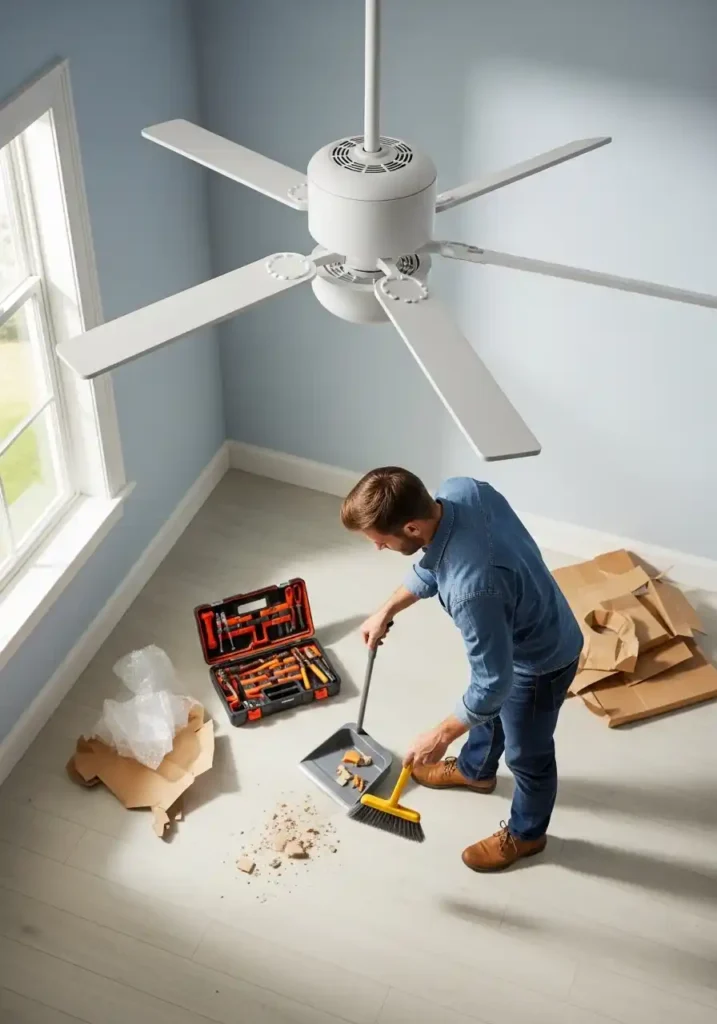
14. Enjoy the Final Result
Once installed, your ceiling fan will provide better airflow and help reduce energy costs. It can keep your space cooler in summer and circulate warm air in winter. Beyond comfort, it adds an updated decorative touch to your room. You’ve successfully completed a DIY project like a pro.
Final Thoughts
Installing a ceiling fan may seem complicated at first, but breaking it down into simple steps makes it manageable for beginners. With careful preparation and attention to safety, anyone can complete this project confidently. Not only will you improve your home’s comfort, but you’ll also gain valuable DIY experience. Now that you know how to do it, you’ll feel ready to tackle even more home improvement projects.